
Preservation Month begins in May, but I wanted to get a head start on sharing some basic, practical tips-and-tricks on caring for your family heirlooms at home (or prepping your papers for archival donation!), as I know that many of us who are stuck inside have turned to organizing and de-cluttering. Believe it or not, there is a lot you can do from home to get your treasures ready for future donation to the archives and/or generally ensure that they survive long enough to wow your great-grandkids.
1. Inventory
The best starting point, even for a private collection that you have no thought of donating, is always to create some kind of written inventory. SCUA has a template Excel spreadsheet for this purpose linked from our Donation and Transfer Guidelines webpage. But even a handwritten list is better than nothing. It’s hard to make plans for what goes where if you’re not entirely sure what you have, or where it is now. Or what format it’s in: for example, if you actually have a physical copy of that photograph of Great-Aunt Lucy that you remember seeing around here somewhere, or if you only have a low-resolution .jpeg of it that you snapped on your flip phone ten years ago at your cousin’s house and then stored on an unlabeled CD-ROM. If you know, you won’t have to guess.

2. Document the Context
We’ve all been at one of those family gatherings where someone brings out a photo album and spends 15 minutes narrating each image, trying to remember if that kid in the glasses is their niece’s friend’s ex-boyfriend or adopted brother, or whether that portrait behind the old barn was taken before or after they renovated the inside. You may know why each you kept each one of your photographs, and where and when they were taken, or who the people are in them. You may know that that old restaurant menu in your bureau drawer was from the night your husband proposed to you. But would your friends know any of this? Your grandchildren? The stranger who processes your papers in the archives a decade or so after your death? If you want your papers, your family heirlooms, your collection of bobble-headed cartoon characters to carry any real meaning in the future, when you may or may not be there to explain their significance, you have to record the who, what, when, where, and why of items — particularly images — that cannot speak for themselves.

3. Improve Your Items’ Immediate Environment
Advice for this point will depend a lot on what you have and what shape it’s in. If in doubt, or if you have specific questions about unusual artifacts, you should get in touch with Sonya Barron (sbarron@iastate.edu) from our library Preservation department, and she will be able to provide more expert guidance. Here are some very general tips, though:
a. Dark, Dry, Cold
There’s a lot we could unpack around this recommendation, and the Library of Congress and other resources document more details. But, generally speaking, you want any storage location you select to meet all three of these specifications the majority of the time. A dark, dry, and cold(er) environment, if also free of more obvious contaminants like mold or bugs, will make your paper, film, and other historical documents happier than pretty much anything else. Aligning your storage environment with this “DDC Rule” (a term I just made up, but which should totally catch on) may mean something as simple as draping a curtain over that bookcase that gets a full blast of sunlight from a southern-facing window, or installing a shelf in your basement so you can raise boxes off of a floor that sometimes floods. It may, however, also mean reckoning with the need to take your photos off the wall and replace them with scanned replicas (because the originals will fade over time with light exposure) or with the reality that a rented storage unit might suit your particular collection better than your attic or garage.
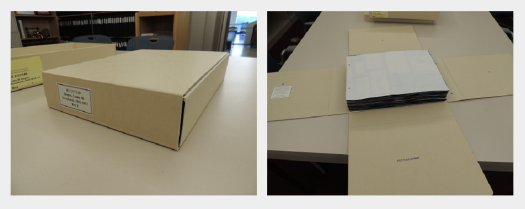
b. No More Mr. Clippy
A lot of people don’t realize that most common, everyday office supplies and/or packing materials actually harm documents and artifacts in the longrun more than they protect them. Anything metal (paperclips, binder clips, three-ring binders) will rust within a few decades and either transfer that rust to the paper or else stick to the paper so that a document cannot be handled without tearing. And don’t even get me started on rubber bands. These dry out after a few years and can stick to the surface of whatever they are holding together, and in general become incredibly gross. In short, processing archivists of the future will bless you if you take the time to remove and replace these sorts of things now.
If you need to hold documents together, it’s best to use plastic clips (aka Plastiklips, which are standard in most professional archives), but you can also substitute stainless steel staples or coated paper clips if this is impossible.

c. Wash Your Hands!
And, no, not only because you are trying to flatten the coronavirus curve (though that’s a good reason, too). When you are handling your documents, photos, or artifacts, your hands become part of these materials’ immediate environment. Clean AND dry hands are the best way to go. Obviously, this means no jam-hands, but it also means no lotion or hand sanitizer right before you work with your collections.
In addition to minimizing exposure to dirt or moisture, you’ll also want to be mindful about anything that could leave a permanent mark on your treasures. Save snack time and happy hour for after your sorting session, and only use pencil or electronics in that vicinity (as opposed to pens, markers, highlighters, etc.).
And that’s all for now! If you have more questions, feel free to contact the archives at archives@iastate.edu. We’re all social distancing at the moment, just like you are. But we are still here to help.


 Gawain Weaver discussing the dye layers of various chromogenic (color) photographic materials.
 The same glass negative scanned as a negative, and seen as it might appear if a print was created from the negative.


